 Back to list
| Tool download | Click to download |
1.First use USB connect the computer and printer, turn on the printer power, make sure the blue light is always on, press FEED paper feeding is normal
2.Open JS-Test software
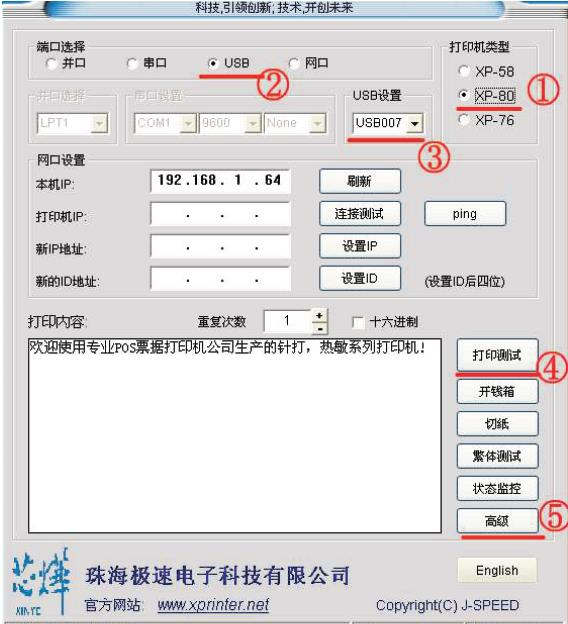

①printer type" XP-80"
②choose USB
③USB port settings, select " USB007"
④click "print test". if paper does not come out, USB choose again USB006, then print and test again, and test in sequence until the machine can print paper and test.
⑤click "advanced"
3.click "network settings" in the network related area

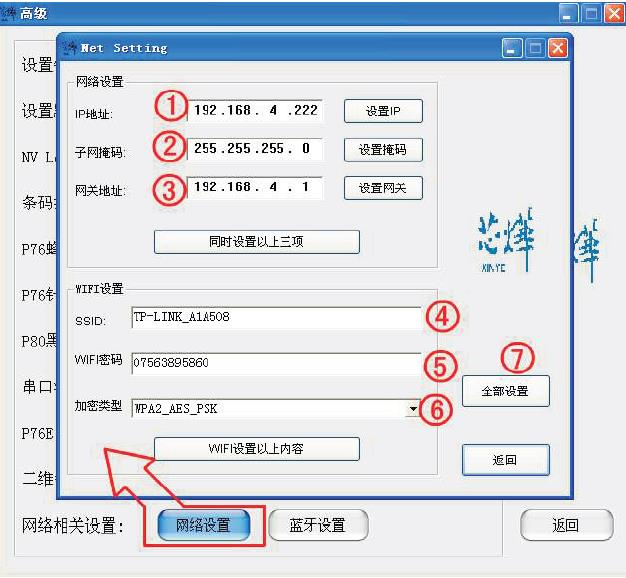


4.fill in items 1-6 in turn. please do not set according to the picture. you must set your own. WIFI information, and then click "all settings". after the printer makes a beep sound, the settings are completed.
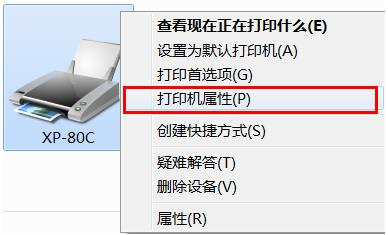
5.then install the printer driver. select any port during installation. after the installation is completed, find the printer driver in the control panel, device printer, right-click, click, printer properties ( XP system click properties).

6.click port to add a port.
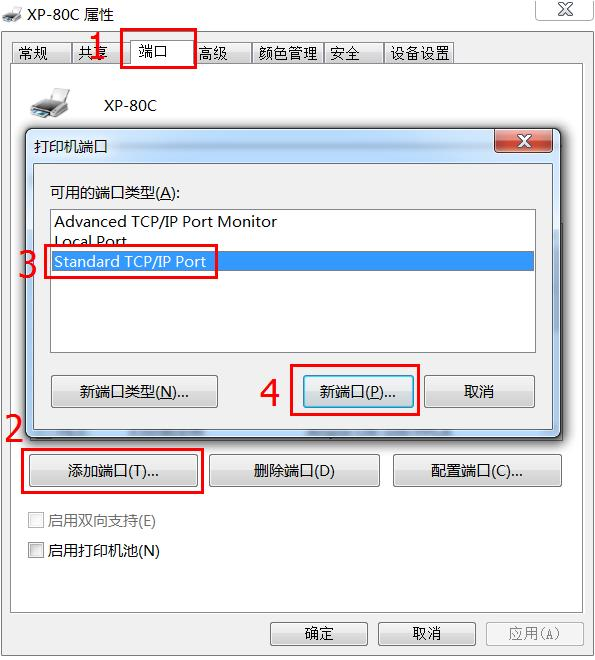

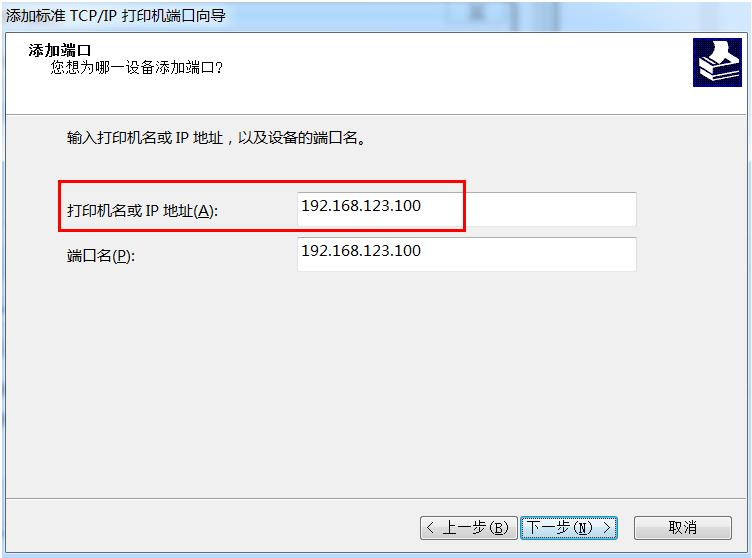
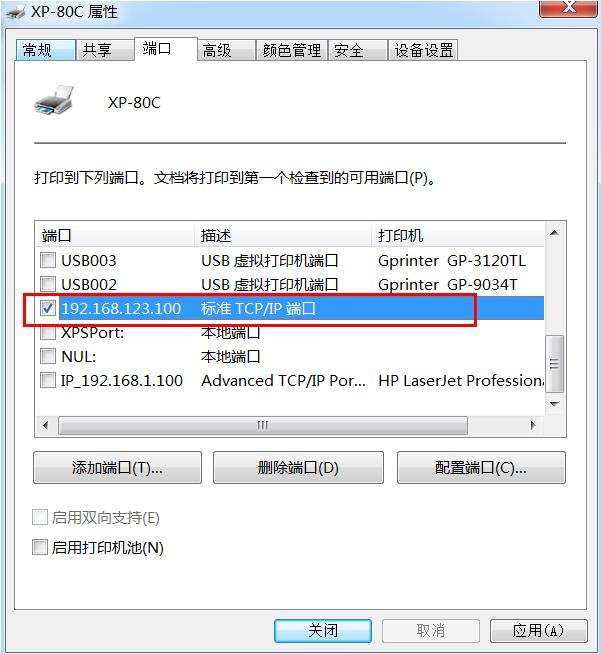
7.choose Standard TCP/IP Port, click on the new port again. after the next step, enter again IP address, (assume that the above IP the address is 192.168.123.100 )。

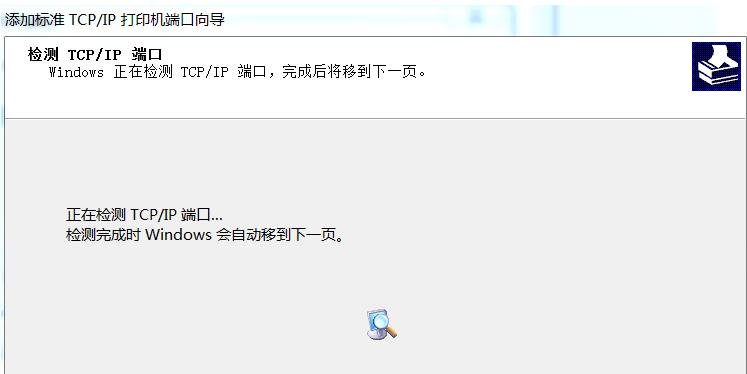
8.searching.

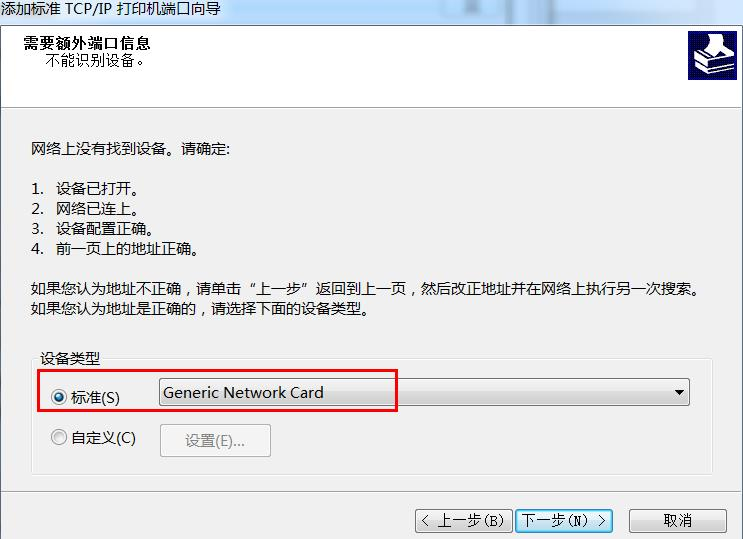
9.selection criteria Generic Network Card。

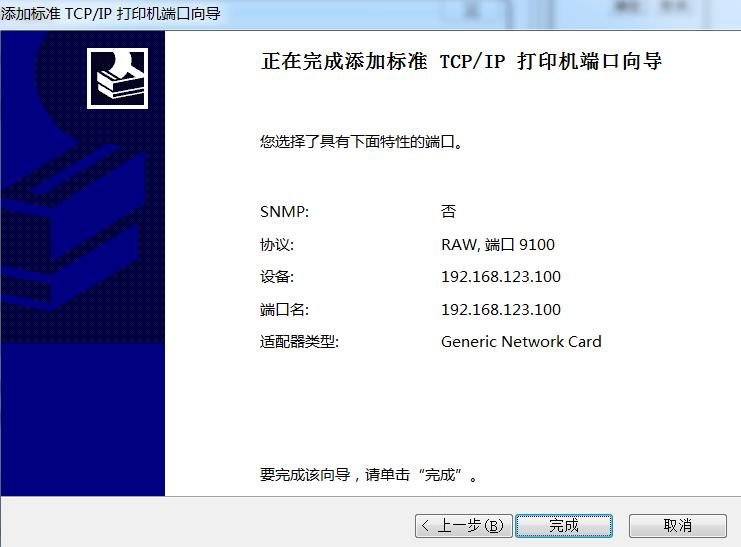
10.next, click finish.

11.click close.
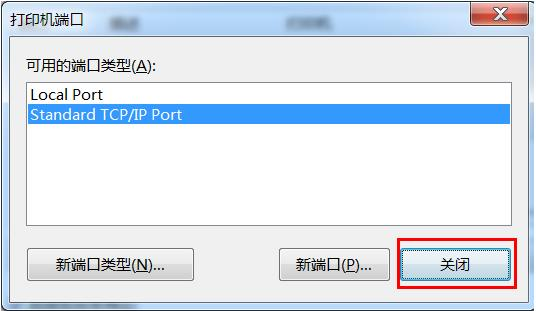

12.the port is automatically selected as 192.168.123.100, click apply, and finalize.

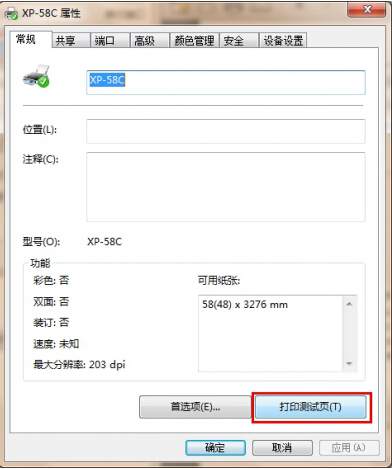
13.IP after setting the port, click general and print a test page. if the machine can eject paper, the installation is successful.

Installation video tutorial
Frequently asked questions